定制controller转场动画

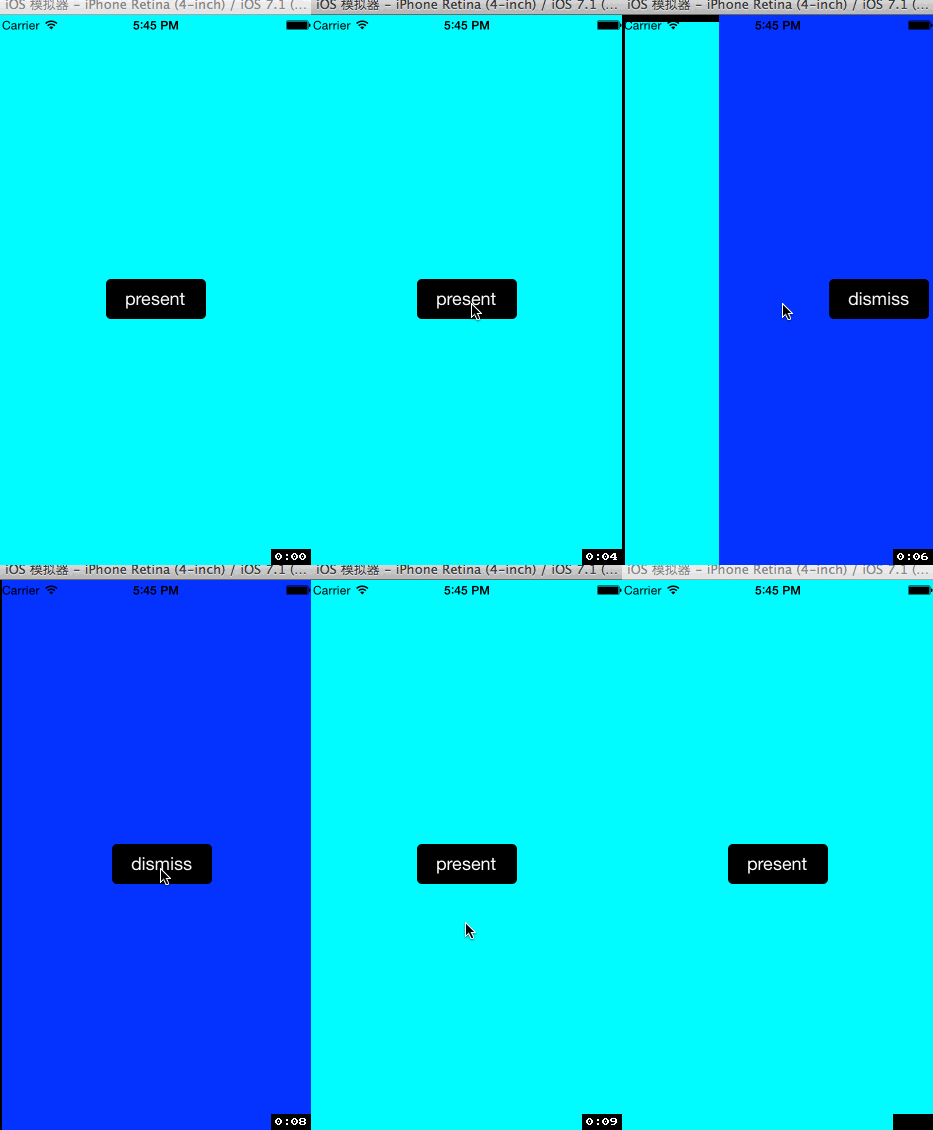
从iOS7开始就可以自由定制控制器间的转场动画了,以下实例描述最简单的定制方式,达到的效果如下所示:

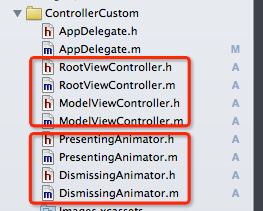
为了实现这个效果需要这么多的文件-_-!!!!

RootViewController


//// RootViewController.h// ControllerCustom//// Copyright (c) 2014年 Y.X. All rights reserved.//#import@interface RootViewController : UIViewController@end


//// RootViewController.m// ControllerCustom//// Copyright (c) 2014年 Y.X. All rights reserved.//#import "RootViewController.h"#import "PresentingAnimator.h"#import "DismissingAnimator.h"#import "ModelViewController.h"@interface RootViewController ()@property (nonatomic, strong) UIButton *button;@end@implementation RootViewController- (void)viewDidLoad{ [super viewDidLoad]; self.view.backgroundColor = [UIColor cyanColor]; _button = [[UIButton alloc] initWithFrame:CGRectMake(0, 0, 100, 40)]; _button.backgroundColor = [UIColor blackColor]; _button.layer.cornerRadius = 5; [_button setTitle:@"present" forState:UIControlStateNormal]; _button.center = self.view.center; [self.view addSubview:_button]; [_button addTarget:self action:@selector(buttonEvent:) forControlEvents:UIControlEventTouchUpInside];}- (void)buttonEvent:(id)sender{ // 推出控制器 ModelViewController *modalViewController = [ModelViewController new]; // 设置转场动画代理 modalViewController.transitioningDelegate = self; // 定制转场动画 modalViewController.modalPresentationStyle = UIModalPresentationCustom; [self presentViewController:modalViewController animated:YES completion:NULL];}- (id )animationControllerForPresentedController:(UIViewController *)presented presentingController:(UIViewController *)presenting sourceController:(UIViewController *)source{ // 推出控制器的动画 return [PresentingAnimator new];}- (id )animationControllerForDismissedController:(UIViewController *)dismissed{ // 退出控制器动画 return [DismissingAnimator new];}@end
ModelViewController


//// ModelViewController.h// ControllerCustom//// Copyright (c) 2014年 Y.X. All rights reserved.//#import@interface ModelViewController : UIViewController@end


//// ModelViewController.m// ControllerCustom//// Copyright (c) 2014年 Y.X. All rights reserved.//#import "ModelViewController.h"@interface ModelViewController ()@property (nonatomic, strong) UIButton *button;@end@implementation ModelViewController- (void)viewDidLoad{ [super viewDidLoad]; self.view.backgroundColor = [UIColor blueColor]; _button = [[UIButton alloc] initWithFrame:CGRectMake(0, 0, 100, 40)]; _button.backgroundColor = [UIColor blackColor]; _button.layer.cornerRadius = 5; [_button setTitle:@"dismiss" forState:UIControlStateNormal]; _button.center = self.view.center; [self.view addSubview:_button]; [_button addTarget:self action:@selector(buttonEvent:) forControlEvents:UIControlEventTouchUpInside];}- (void)buttonEvent:(id)sender{ [self dismissViewControllerAnimated:YES completion:^{ }];}@end PresentingAnimator


//// PresentingAnimator.h// ControllerCustom//// Copyright (c) 2014年 Y.X. All rights reserved.//#import@interface PresentingAnimator : NSObject @end


//// PresentingAnimator.m// ControllerCustom//// Copyright (c) 2014年 Y.X. All rights reserved.//#import "PresentingAnimator.h"@implementation PresentingAnimator// 转场动画时间- (NSTimeInterval)transitionDuration:(id)transitionContext{ return 0.5f;}- (void)animateTransition:(id )transitionContext{ // 自己的view UIView *fromView = \ [transitionContext viewControllerForKey:UITransitionContextFromViewControllerKey].view; // 另一个view UIView *toView = \ [transitionContext viewControllerForKey:UITransitionContextToViewControllerKey].view; // 管理容器 UIView *container = [transitionContext containerView]; container.backgroundColor = [UIColor blackColor]; // 容器中添加推出的view [container addSubview:fromView]; [container addSubview:toView]; // 开始动画(移出fromView,移进toView) [UIView animateWithDuration:[self transitionDuration:transitionContext] animations:^{ fromView.frame = CGRectMake(10, 10, 320-20, 568-20); // 设置toView从右侧偏移进来 CGRect toFrame = toView.frame; toFrame.origin.x = container.bounds.size.width; // 偏移一个控制器 toView.frame = toFrame; toView.center = container.center; } completion:^(BOOL finished) { // 动画结束 [transitionContext completeTransition:YES]; }];}@end
DismissingAnimator


//// DismissingAnimator.h// Popping//// Created by André Schneider on 16.05.14.// Copyright (c) 2014 André Schneider. All rights reserved.//#import@interface DismissingAnimator : NSObject @end


//// DismissingAnimator.m// Popping//// Created by André Schneider on 16.05.14.// Copyright (c) 2014 André Schneider. All rights reserved.//#import "DismissingAnimator.h"@implementation DismissingAnimator- (NSTimeInterval)transitionDuration:(id)transitionContext{ return 0.5f;}- (void)animateTransition:(id )transitionContext{ // 自己的view UIView *fromView = \ [transitionContext viewControllerForKey:UITransitionContextFromViewControllerKey].view; // 另一个view UIView *toView = \ [transitionContext viewControllerForKey:UITransitionContextToViewControllerKey].view; toView.frame = CGRectMake(10, 10, 320-20, 568-20); // 管理容器 UIView *container = [transitionContext containerView]; // 容器中添加推出的view [container addSubview:toView]; [container addSubview:fromView]; container.backgroundColor = [UIColor blackColor]; // 开始动画(移出fromView,移进toView) [UIView animateWithDuration:[self transitionDuration:transitionContext] animations:^{ CGRect fromFrame = fromView.frame; fromFrame.origin.x = container.bounds.size.width; fromView.frame = fromFrame; toView.frame = container.frame; } completion:^(BOOL finished) { // 动画结束 [transitionContext completeTransition:YES]; }];}@end

为什么设计成代理呢?其实,这是为了让基本的控制器(推出其他控制器的控制器)持有被推出的控制器而已,我是这么理解的.
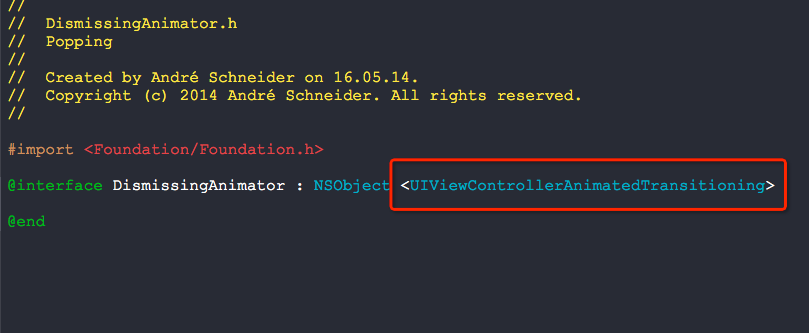
为了能够实现控制器间的转场动画,我们需要一个实现了UIViewControllerAnimatedTransitioning协议的对象才行.
也就是PresentingAnimator以及DismissingAnimator

最少实现里面的两个方法:
- (NSTimeInterval)transitionDuration:(id<UIViewControllerContextTransitioning>)transitionContext
- (void)animateTransition:(id<UIViewControllerContextTransitioning>)transitionContext

完了,就是这么简单呢.
附录:

这个方法非常关键哦,动画执行完了之后记得设置好了.

fromView本身就被transitionContext包含拥有了,你无须进行上面的那个addSubview操作哦,可以直接去掉即可
